Saturday 29 March 2014

1 stamp....4 cards!

Post 70
Today is a little challenge I set myself. I recently bought Michael Powells 'Tall Urban stamp (On the Look Out) , Which I instantly Loved!.
I challenged myself to make 4 different cards using various techniques.
The first is simply stamped on black card and embossed in white. Matted with black and white card, and finished with some ribbon and a sentiment


The second is stamped in black, then I stamped it again and coloured a fairly large section with my promarkers. I cut my favourite section of the coloured image out with a circle die, and positioned it precisely over the same spot on the black and white image. I cut out a circle frame, using my spellbinders dies, and framed the coloured area. The image was matted on some black and mounted on the base card. The same sentiment was used, some doodling around the edges and some black gems to finish it off.


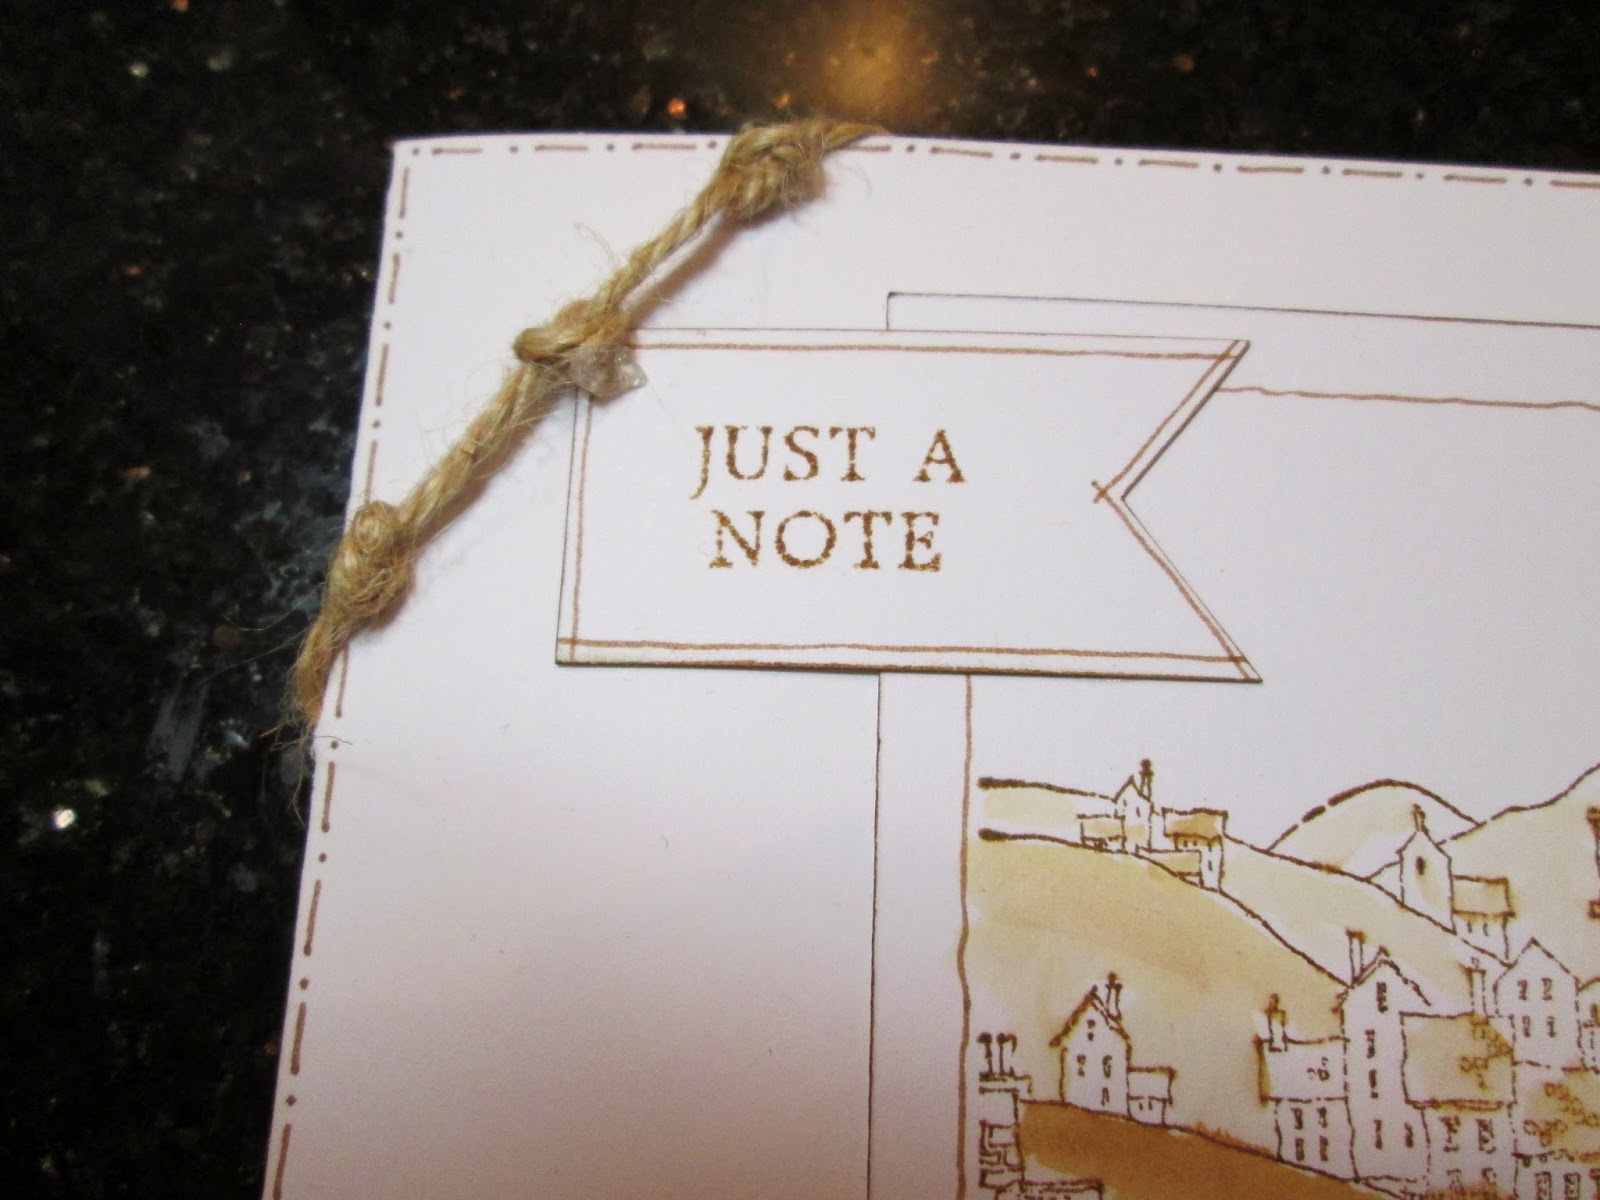
The third time is a one ink pad wonder. Stamped with Vintage photo distress ink and water coloured using the same pad, I heat set the image before watercolouring as I didn't want to lose the sharp lines of the image. I drew a frame around the image using the vintage photo distress marker ( I did use a ruler but only as a guide, on close inspection the frame is drawn with wobbly almost deckle lines more in keeping with the stamp.)  I drew some faux stitching around the card base and my sentiment is cut, banner style, and positioned right over a thumb print!!!!!! Perfect. The card was finished with some old string I found, which I knotted 3 times before attaching it.


My fourth card is stamped onto watercolour card , quite heavy duty so it has loads of texture. I used my Distress markers to water colour the image. I once again drew a frame around the image and added a little zentangle. The sentiment is on a tab I cut using my Envelope punch board. More dooodling around the kraft base card to finish off.


Hope you like todays cards.
Happy crafting.
Clair xxx


Friday 28 March 2014

'Tall cake'

Post 69
Another birthday card today. The image is from Mosdigitalpencil, called 'Tall Cake'!!! 
All coloured with my promarkers to match the backing paper 'Fresh Prints' from Stampin Up. For inspitation for the layout of the card I went to Deconstructingjen, and had a browse around her previous sketches, and found this.

Matted and layered with co ordinating papers onto a kraft base card.


I used the 'Label Love' stamps and coordinating punch from Stampin Up , for the sentiment.
All the layers have been inked around the edges with Vintage photo distress ink, then some faux stitching added around the layers using the vintage photo distress marker.


I finished the card off with some glossy accents on the icing of the cake.
Hope you like todays card.
Happy crafting .
Clair xxx


Thursday 27 March 2014

Minion!!!

Post 68

Have been very lazy for the last week...trying to get over my latest birthday!!! Don't ask.
Hay ho! Another birthday now...my sons best friend. I thought being 8, he would like a Minion as much as my son!!!
I found a fabulous video tutorial on You Tube, making this card , HERE. She uses the framelits 'Flip its' die in the video...I don't have this so I used my spellbinders dies and followed this tutorial for a flip it card ...HERE  .All my card stock is Coredinations. 


Hope you like todays card.
Happy crafting.
Clair xxx

Thursday 20 March 2014

Secret Garden....

Post 67
Todays card uses my new, had to have, 'Secret Garden ' background stamp from JustRite. I stamped the image onto some kraft card, I used a white chalk ink......it didn't show up very well, but I liked,  just enough to enable me to colour the flowers.


I decided to use my coloursoft pencils for this one, I was pretty happy with the result!! I highlighted the flowers with a black fine tipped pen, and once the card was finished I went in with a white gel pen to highlight the stems and leaves.


All the other stamping is from the JustRite 'Celebrations labels one, brackets and borders' clear stamp set. Both embossed in white onto the blue coredinations card.


The card needed some pearls , just to finish it off.


To go with the card I'd bought the recipient a Yankee candle. The lovely Sam at  Pootles.com, did a video tutorial to make this box for just this type of candle....Perfect! Click HERE for the tutorial. I used white centura card for the box, and decorated it with more of the coredinations card....some of which was stamped and embossed with the Secret Garden stamp.


Perfect little gift!!
Hope you like todays card and gift.
Happy crafting .
Clair xxx

Wednesday 19 March 2014

One for a Gardener!!!!

Post 66
Todays card is a man card. The main image is from Joanna Sheens cd rom ' Jayne Shashkys Heart of the Garden'. The image was printed for decoupage, but I haven't used all the layers available.
Once built up it was matted onto various colours of card, then mounted on to a 6x6 card folded to make an easel card.


The stopper for the easel is made from backing paper from the cd.
The small panels on the insert part of the card and on the back were part of the original topper sheet on the cd.


The sign with the sentiment has some twine stuck behind it. I shaped the twine by coating it in a little cosmic shimmer glue and leaving it to dry in the position I wanted it to stay in. This was a tip from K Werner design, she has many you tube videos, but it was this Balloon video I got the twine shaping tip from. The card was embellished with a few card candi, from Craftwork Cards.


The card ended up being so dimensional I needed more than just an envelope to put it in. With THANKS to The Crafty Owl and her Box Buster, it was really easy to make an envelope box with my envelope punch board, customized specifically for my card......marvellous!

Hope you like todays card.
Happy crafting.
Clair xxx


Monday 17 March 2014

'Peaceful Lakeside'

Post 65
I was inspired by an article in Craft Stamper (April 2014) 'Ready Steady Craft'. The crafter had stamped and painted an image then mounted behind a window of kraft card.....I had to have a go.

The stamps I used are from Sheena Douglass's 'A Little bit Sketchy' range. The stamps sets I used are 'Peaceful Lakeside' and 'On the Water'


I began by stamping the boats on some water colour paper using Archival ink, the hills in the background are stamped using my Distress markers. I then went in to water colour using various distress markers.


I stamped the boats again onto some kraft card, cut an aperture in the kraft card with a square spellbinder die, then positioned it over the water colouring, so the boat images perfectly matched up.
I drew around the square, just to give it a frame. This was matted it onto some more kraft using foam pads, then onto a white card blank. I stamped the greeting on some watercolour paper, just so it didn't distract too much from the main image, as it would do stamped on white paper.

The insert needed more than just the greeting , so I used the little yacht from the 'On the Water' stamp plate, and gave it some distress marker colour.


I had to stamp this cute little boat on the back of the card , just to finish it off!
Hope you like todays card.
Happy crafting.
Clair xxx 

Saturday 15 March 2014

Some Little birdies...

Post 64

Todays card is using Tiddly Inks digi stamp called 'For the Birds'. They have been coloured using promarkers, and matted onto some blue and black paper.

All the coloured papers I used are from various collections at Pink Petticoat. The decorative tape stamps are from Kaisercraft 'Decorative tape pieces', I stamps these onto  the colour paper and cut them out. Where the stamp had a zigzag edge I cut this off and just stamped the image on the base card before sticking the coloured image over the top.....no losing of the decorative 'Tape' edges.


The wording, I printed off and cut each letter out....doodling around the edges once they were in place on the card.


The stitching around the edge is from a stamp set by Hot Off the Press, stamped with a white ink.


I used Kaisercrafts 'Wood grain' texture stamp for the buttons, with a little twine in the centre.


Inside are a few more decorative tape pieces.

Hope you like todays card.
Happy Crafting.
Clair xxx

Friday 14 March 2014

Wedding....again!!

Post 63
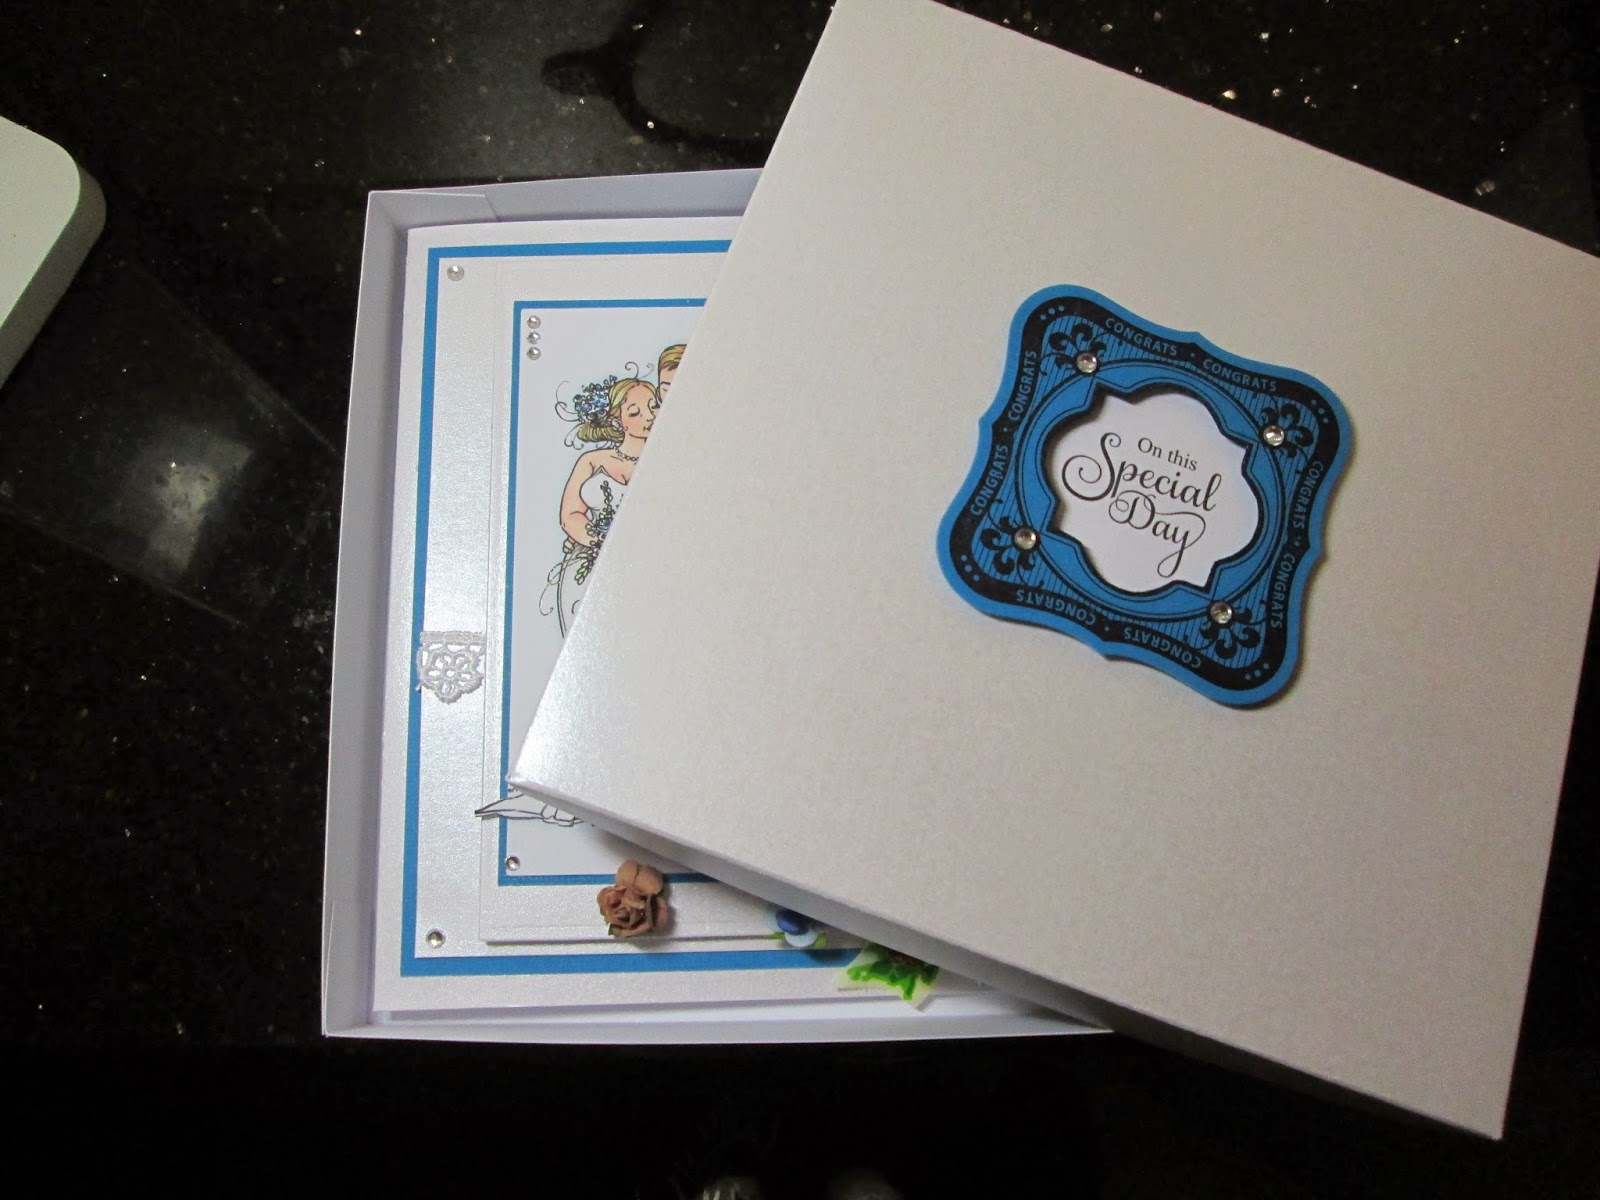
This time with a gorgeous image from Mo Manning called 'Wedding Couple'. The base card is made from snow white silver centura pearl card. I decided to go with blue accents for this card so the base is matted with blue coredinations card. The image has been coloured with pro markers, then highlited using a sakura stardust pen.


A beautiful scrap of lace I had in my stash was a perfect fit across the card. All the flowers are from Wild Orchid Crafts, I love a touch of brown with the blue.


The sentiment is a digi stamp from Tiffany Doodles, this is matted on more blue card and a spellbinder die.
The verse inside is a quote I found on Pinterest, from Dr Seuss...perfect!


The box just finishes it off.
Thought I'd enter Mosdigitalchallenge 'Plenty of Embellies'

Hope you like todays card.
Happy crafting.
Clair xxx